Factory Five Racing Forum banner

Fosters Build Thread

13K views 57 replies 10 participants last post by  CraigS  
#1 ·
It’s time to kick off the build thread for FFR#9592. I put our order in back in February, opting for the complete kit after having read several threads on the pros and cons of complete vs. donor. So thanks to everyone who has ever shared an opinion on that particular topic.

Options selected: powdercoated frame, 3-link suspension, stainless side pipes, body cut outs, vinyl seats (researching high back seats, so went with the cheapest option here), the classic gauge set, the 15” Halibrand wheels, wind wings, sun visors, battery cut off switch, vinyl dash with glovebox, passenger and driver rollbars chromed, and the assembled side louver set.

Growing list of build mods as I read more build threads:
Second brake reservoir - too many to count
Herb's Door Panels - I think everybody
Russ's trunk mod - only a slightly smaller group than everybody
Seat Warmers - edwardb's 20th Anniversary build
Finished edges on the carpet pieces - edwardb
Dash layout with speedo in center dash - edwardb - already arranged to send back the cut dash
Toying with the idea of a push button start linked to a key fob and dropping the ignition key entirely

Actual build details to follow and a running blog to document the experience of building this with my twin sons.

A big thanks to egchewy (and everyone posting there) for starting his build first so I always have an immediate and current place to look for feedback! This has already saved me from having to pull the F panels to paint them, something I was unaware I wanted to do until I started reading that thread.

Foster
 
#2 ·
welcome

welcome to the madness. i started off fast and furious, but have since slowed a bit on my build. lots of useful info out there and i found that it was better to do lots of research so you don't run into as many issues along the way. i'm pretty sure i've built and rebuilt most of the steps at least once. good luck and feel free to reach out if you have any questions on a certain part of the build.
eugene
 
#3 · (Edited)
Thanks Eugene,

I've got my first question for the board. My sons and I got the passenger side suspension onto the car today. I preemptively wire brushed down the upper control arm before inserting the upper ball joints. Reasonably easy - at least no force applied that seemed excessive. However, I only had blue locktight on hand. Does it need to be the red? Should I pull it apart and apply the red in place of the blue? My mistake was assuming the red bottle corresponded to the type of locktight inside. :)

Driver's side lower control arm front brackets are too close by at least 1/4", so I'll be applying the 1/2" threaded bar + nuts spreader solution to that. Stopped our progress cold this afternoon. And we followed the manual, which had us install the shock prior to the spindle, which added an unneeded challenge. Rewatching the FFR build video at home they install the spindles before the shocks. I might have to watch and take notes at the same time.

Short term punch list:

Reread Jeff's description of the proper orientation for the upper control arms.
Research shock settings and how to change them if needed.

Foster
 
#5 ·
Check upper ball joint orientation for sure. Red thread lock on the BJ. some recommend tack welding BJ to UCA. I don't weld so I just marked it with a silver sharpie so I can see if it starts unthreading. I put the shocks on before spindle without any issues. Double check orientation of spindle to outer tie rod piece.
 
  • Like
Reactions: Foster's FFR
#4 ·
Foster,
You’re doing it correct. Research your next move and double check it when you’re done. Your list of options is a good one. I did many of the same with a basic kit. If you’re unsure of something, post pics and we can all take a look. I’ve caught more than one error I was about to make by reading other people’s build logs. If you get stuck, the pro builders on this site are awesome. That includes edwardb. Don’t stress and enjoy the project. My son and I started the true build on December 22nd of last year. We took our first licensed ride last Tuesday. That being said, the body is coming back off and engine changes will prevent us from driving for a couple of weeks, but it’s no big deal.

Scott
 
  • Like
Reactions: Foster's FFR
#8 ·
EXCEPT...don't use loc-tite of any kind on the nylock nuts. The chemical will destroy the plastic insert.


John
 
#9 · (Edited)
Thanks for the feedback all. Given the difficulty in getting the upper ball joints out, I'm going to take the wait and see approach. I'll apply torque paint and monitor the situation. If, when finally on the road, the upper ball joint starts working free, I'll take advantage of whatever force loosened it up to break it down and apply red lock tight at that point.

Next question, which raises another question - couldn't these be called question threads instead of build threads? Or maybe Q&B threads, since there seems to be equal amounts of both? :)

The attached pic shows a small set screw included with the front Konis (perhaps the least interesting first pic in a build thread). I assumed it is a set screw used to pin the spring seat to the sleeve, but cannot confirm that in the manual. It fit in the spring sleeve and so that's where they are now. Was that the correct assumption?

Foster
 

Attachments

#10 ·
Tour and Build Space

There wasn't really a question about whether or not I was going to build an FFR. It was the boys I wondered about. My two sons had always proclaimed interest, but would they actually be committed to such a large project? To gauge their commitment we took a drive to the factory for a tour. The tour was great, but it was the showroom that really grabbed their attention. It definitely piqued their interest and brought them back 10 years to their first ride in a Factory Five Roadster.

On the drive home we finalized the decision to buy a complete kit and start the build process.

Foster
 

Attachments

#11 ·
Build Space

The biggest immediate challenge was having no suitable space for the build. I shopped around some for garages - all commercial sites with 10,000+ sqft and 4 digit monthly rentals, storage garages - really designed for park and leave, no power, no lights, no facilities, and even asked a few friends to rent their garages - they all had too much non-car stuff stored there.

So my wife ended up suggesting her commercial property. I'd only been there once or twice and only on the retail side of the building. Turns out, there was a usable garage space. It had two drawbacks - it was 45 minutes away on a good day and there was no way to drive into the garage. It's more accurate to call it a loading dock area.

But it was free, so we started the cleanup. We hauled out the junk, installed some new lighting, bought the first of many new tools, kept every bit of cardboard to cover the cold and dirty floor, set up some shelves, and added some decoration to the walls to save us from having to paint them.

Foster
 

Attachments

#12 ·
Blue thread locker will be fine. Yes, the setscrew is for the spring collar but I don't recommend using them; they have the potential to "booger up" (that's the technical term) the threads on the sleeve. Once the weight is on the springs the adjusting collars will not move. I've deleted them on every car I have built and after tens of thousands of miles and years on the road none of them have ever changed.

Carry on and good luck!

Jeff
 
#14 ·
Garage Drawbacks

There weren't any reasonable options for dealing with the distance to the garage. So I focused on drawback #2 instead. Over the last couple of winters the spot in front of the garage had become the primary spot to pile the snow. As a result, it was an uneven mass of gravel, weeds, and dirt. I had plenty of room in the lot for the delivery truck to park parallel to the building, but only 25 or so feet between the building and the road. So the frame and body would have to be unloaded and then moved into the garage.

I looked at renting a bobcat to even out the ground. I looked at dozens of ramp possibilities, most of which would not accommodate the wheels on the dolly the frame would be lowered onto, and thus invited further modification. I considered building a ramp, even pouring a concrete one. At the end of the day all of these options added up to a large investment of time and money.

After researching how much the frame weighed, with and without the body, I decided to build a set of ramps that would line up with a UHaul truck and fetch the kit myself. Ramp assembly was reasonably straight forward and I ended up with a nice gentle slope from the height of the truck bed to the floor of my garage. Picture 2 shows the double lip I had to account for due to the prior-owner's strange decision to not align his loading dock with the floor of the loading bay.

Lessons learned:

1. Don't say things like "I'll need to go to Home Depot maybe twice. This is a mechanical build." The universe will immediately engineer reasons for you to visit Home Depot on a weekly basis. This will include your water line for the ice maker letting go and flooding your kitchen the week before you are ready to start in on the front suspension.

2. The height of the truck bed is not the only truck dimension that needs to be factored into a ramp build.

Foster
 

Attachments

#15 ·
FFR Pickup

With the garage cleaned out, lit, and mostly prepped for the build and my delivery date already a week in the past it was time to pick up the kit. My friend and I secured a UHaul truck and made the drive south to Wareham.

We talked about the build and my plans for the car. I noted we were driving in a Ford truck and that I'd be putting a Ford engine into the roadster. So of course the lot at Factory Five Racing was full of Corvettes when we pulled in. A Corvette club from Pennsylvania was traveling in New England and had made Factory Five a stop on their road trip.

Seeing a new Gran Sport and new Z06 sitting across from each other was very cool. As nice as they were, they weren't the car I was there for, that car was waiting inside. Or at least all the parts that made up the car. Or most of them. Back orders, you know.

We wandered inside and in short order they were pulling 9592 and the part pallet down from the racks. We started loading boxes while they pulled the frame and body and then watched as custom rig made loading the UHaul an almost comically simple process.

We buttoned up and headed north to the garage, where I would discover the flaw with the ramp I'd built the night before.

Time lapse video: https://youtu.be/yWeiixDucGg
 

Attachments

#19 ·
Can't weld

That is an alarming amount of travel for just a few miles. I'll make sure to put on a mile or two while in go-cart stage to keep an eye on things. If they are walking, I'll weld them in.

Jeff - the usual way - https://media.giphy.com/media/W6US3Xlt7uZLa/giphy.gif

Although that would probably break the new welds on the upper ball joints.

I'll hire a flatbed for a short delivery. Tilt the bed down a bit to line up with the 26" dock height, winch roadster onto flatbed, short right hand turn, lower flat bed and winch car to the ground.

Foster
 
#21 ·
Read the instructions

I spent years writing instructions for use for medical devices. You would think that would instill an inclination to carefully read every set of instructions one comes across. Most of the time, but sometimes your brain stops taking in information when it believes it has the critical piece of data. For example:

"The spindles are marked DSS (Driver Side Spindle) and PSS (Passenger Side Spindle)." - I thought this was the critical piece of information, as I was trying to determine which was which. Oh, it's stamped on the part. Great. So we tossed one on last Sunday, but then the steering arm seemed wrong.

So last night I revisited the passengers side set up and it was wrong. After staring at the pictures and much head scratching I *read* the manual again.

"These refer to the way they are mounted on the FFR Hot Rod. Which is rear steer The FFR Roadster uses these as Front steer so they are mounted opposite, The DSS spindle is mounted on the Passenger side and the PSS spindle is mounted on the Driver side."

Well. That explains a lot.

Pulled it apart and switched the spindle. Only the bottom castle nut is torqued down, mainly to see if I'd need a washer to align the cotter pin properly. It will. Looks true for the top castle nut too. Haven't adjusted the upper control arm yet. Does the rest of the setup look correct?
Foster
 

Attachments

#23 ·
Headers

I also spent some time on the engine. Hit all the rusty bolts with WD-40 and got the headers off. They are riddled with dents, but as this is my first time up close and personal with a set of SBF headers, I'm not sure what an acceptable amount of abuse is. It seems to me like too many dents is going to screw with the exhaust flow. Thoughts?

If they are salvageable, any recommendations for painting/coating them. Lots of options it seems, I'm wondering what's been successful.

Foster
 

Attachments

#24 ·
...They are riddled with dents, but as this is my first time up close and personal with a set of SBF headers, I'm not sure what an acceptable amount of abuse is.

Foster
All of those indentations and "dents" are factory installed! They aren't abused; this is the way Ford made the OEM 5.0 Mustang headers. Honestly, I'd toss them and pick up a set of BBK shorties for about two hundred bucks---because it's easy for me to spend your money!

Jeff
 
#26 ·
Progress and Questions.

Thanks for the feedback Jeff and Rich. I'll consider the shorty headers. It looks like they will work with J-pipe setup I ordered.

Great father's day at the garage today. The boys and I got the driver's side suspension in. We also assembled the front brakes and put those on. Which leads to question #1.

Q1 - Are these the correct bolts for mounting the calipers to the spindle? They threaded in nicely and seemed correct, but I'd appreciate the confirmation, as I didn't see a clear picture in the manual.

With the brakes installed and stomachs growling, the boys were getting impatient to leave. I wanted to tackle at least one more thing, so we pulled the steering rack out. We quickly discovered that the spreader we'd just used to mount the driver's side lower control arm would be needed again, this time on both steering rack mounts. A little convincing and the steering rack dropped in place. We then attached the tie rods and linked those to the tie rod arms.

With both ends attached, I grabbed one of the spindles and gave it a twist. The opposite spindle turned in unison. Both boys celebrated the sudden transformation of the frame into something one step closer to a car. What a great moment, all of us beaming with the progress we'd made.

Of course, I'll have to back a bit of it up for corrections. I'd forgotten that we didn't finished drilling the holes for the F panel due to a snapped drill bit. I'll pull the upper control arm off to get access. No big deal. We considered this a dry run, nothing has been torqued down yet. Which leads to question 2.

Q2 - for the lower control arms, does it matter where the spacers are placed? I put them in where the obvious gaps were, front or back, but I'd appreciate a confirmation.

Foster
 

Attachments

#27 ·
Roadster meet garage

The video of loading the roadster at FFR is linked back in post #15. Below is the link to the tail end of that day.

As I mentioned, there was one measurement that I overlooked - the distance between the loading dock and the truck bed, as defined by the loading step on the back of the truck! Whoops.

And the height of the ramp was dead on too! Oh well, I decided to pull the body to lighten the total weight. The long middle section of the video is me trying to get the bottom two mounting screws out while the body is pinned against the wall of the truck. I finally got smart and applied a set of vice grips to the problem. My friend can be seen unloading the majority of the complete kit boxes over that time.

We pulled the body, decided to move it out of the way in case the frame got away from us on the ramp, and used the roller dollies I had to move the frame into the garage. From there we muscled it up onto the jack stands. The video shows a couple of frames where the measuring tape comes out. There was room against the back wall for the body and body buck, but only if I moved the shelves around. I put that off for another day as we used a blanket to sweep the truck - didn't want to pay the any cleaning fees on return - and then headed out for the traditional beer and pizza payment.


Foster
 

Attachments

#28 ·
Progress Update

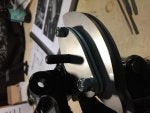
I ended up working on a dozen small bits of the car this weekend. I finished painting the F, firewall, and front foot box panels. In between coats I put some time in on the engine, cleaning off the dirt and debris from the top and pulling one valve cover. Things didn't look great. I got the rear axle up on it's own jack and started stripping it down for repainting. I'm guessing the aluminum disk on the rotor is a spacer of some sort (off and on pics below). Could someone tell me exactly what it's function is? Thanks in advance.

My wife and I also visited Factory Five on Saturday. My rear shocks had come in and we were going to be in that part of the state anyway. It was her first opportunity to sit in a completed roadster and she's looking forward to future rides in ours. I also swapped out my cut vinyl dash for an aluminum blank so I can customize the layout.

Foster
 

Attachments

#29 ·
You're right, that engine doesn't look great. It has taken a lot of water or been in an environment which exposed it to a great deal of condensation. Either way that much rust internally is not good.

The "disc" on the rear axle is a wheel spacer, but being lug-centric rather than hub-centric is not a good one. What is the rear end from? Unless you end up using wheels with some rather unconventional offset and backspacing you shouldn't need a spacer but if you do use ones that pilot the rims on the hub and not the lugs.

Jeff
 
#30 ·
Thanks Jeff. The rear is from the same Mustang parts yard as the engine and transmission, but I don't have any specifics. I'm using the 15x8/9 5-lug Halibrands from FFR. Once I get those, I'll check the fit and go with hub-centric if I need a spacer.

I wanted to do a complete tear down on the engine anyway, so I'm not too concerned yet. We will see how I feel when I can see the cylinder walls.
 
#31 ·
Questions & Answers

Over the many years that I've read build threads I've often wished for more regular updates on the builds I was following. I planned on knocking out regular updates when I started my build. The universe had other plans. :)

Long story short, a leaky ice maker feed line lead to pulling up the floor, which led to discovering the prior owners had also had a leak and had opted to just cover up the damage. And the black mold. So, out came the subfloor, damaged cabinets, stove, fridge, and dishwasher. All of which led to damaging the gypcrete sub-subfloor. Couple of months later and I've got everything repaired and a new floor installed in the kitchen.

The build has languished a bit as a result, with the boys and I finally getting to the garage on Sunday after all of July off.

Which leads to one progress pic and one question. The question involves the long center mounting bolt for the clutch quadrant. It seems too long (see pic). It's a 2 inch bolt, but is listed in the manual as 1.25". It was in the bag with the clutch quadrant.

Should I source a 1.25" bolt and swap it out?

Progress this week included drilling and mounting the firewall and pedal box panels. Miles went through 4 drill bits. Nathaniel spent time grinding rust and paint off the rear end while we went out to buy more drill bits. The front suspension is complete, with the exception of one damaged hub cover which needs to be replaced. It got hammered into place a little too zealously. There's GE Silicone 2 oozing out all over the place that needs to be cleaned up. And the silver rivets on the F panels were replaced with black ones - they look better against the trunk bed liner sprayed there.

So, things continue to be messy and mistakes continue to be made, but the boys are learning quickly. Initial grumpiness about being in the garage always turns to smiles and pride when the day's progress results in Frankie looking even incrementally more like a car. This Sunday it was Nathaniel's turn to really not want to be there and he's the one who ended up climbing into the frame with a big smile when the pedal box went in. :)

Foster
 

Attachments

#32 ·
August Progress

We were back to work this weekend on the pedal box. We had rough fit it last weekend to ensure we had it assembled correctly. I did notice that I'd put the pedal switches mount plates on the wrong side of the pedal box frame. Then I noticed that both switches needed to be mounted as far onto those plates as possible so they didn't hit the mounting bracket.

With those small adjustments made, we put the pedal box back on the frame to mark the needed drill holes. I caught the problem early this time, realizing that the holes would be off by 1/4" or so if the pedal box wasn't tight against the footbox front panel. I tossed a few nuts on and sure enough the holes shifted down.

Miles did an excellent job drilling out the holes through the frame - a tricky bit of work given that it's on a slight downward angle.

With the pedal box mounted we started in on the steering. We already had the front rack in place, so we checked the distance between the two tie rods and adjusted them until we reached the recommended 53 1/16" distance.

When we went to torque the castle nuts down they didn't reach 25 ftlbs. They eventually were just spinning in place. Anyone have any insight on that?

We then assembled the steering rack. That went pretty easily, but I see now that the PDF version of the manual is different than the hard copy. That'll lead me to double-checking everything next time I'm in the garage. The biggest help would have been to not mount the flange bearing to the footbox wall first. That gave us a little trouble when it came to pushing the shaft through. All in all I think it took us 25 minutes to get it all together. At which point we had to assemble the steering wheel and toss that on there. Big smiles all around at that moment.

Foster
 

Attachments