Factory Five Racing Forum banner

Mk4 Bodywork thread

123K views 104 replies 37 participants last post by  tom welch 
#1 ·


Since last year when the Mk4 was introduced with great fanfare about the improved body, molds and methods everyone has been asking about body prep and how it compares to earlier cars. Now that I have my hands on one I decided I might as well try to document it and report my observations and impressions.

As some of you know I am building "indy14" Steve's car (build thread in the signature below). Our original plan was that I would do all of the mechanicals and then Steve was going to have an old friend of his do the body prep and paint. As luck would have it that unravelled when the gentleman closed his body shop and retired! After interviewing several reasonably local pros who have done FFRs we found two things that were common with them all; 1) they are afraid of loosing their *** and quote the job high and open ended, and 2) they are going to do insurance/collision work first, keeping the FFR as filler. After this became apparent Steve e-mailed me and said something to the effect of "You did your car (a mid run MK3) and it looks allright, do you want to do mine?". I chewed on it for a week or so and decided "Oh, what the hell?".

Here is what I've seen so far on this sample of 1:
--The panel alignment is very good overall; it was a little off on the right rear quarter.
--There is no gelcoat in the parting lines.
--There are some pinholes. On this body there was a cluster of 40-50 on the RH side above the fender vent stretching back to the door opening.
--Found some voids across the nose and at the 3 way intersection of the rear quarters/deck/tail cap.
--These two are anomolies I'm sure; while knocking down the mold flashing along the parting line on the top of the LH front fender and at the vertical line running down RH rear quarter I found big globs of gelcoat that did not cure fully. Both were about the size of a silver dollar and once I broke through the top with a DA they were gooey inside. This body was delivered in late June and those spots were still soft...odd??? After getting the gelcoat out the glass behind these two spots was very thin. I built both back up with 3M HSRF and moved on.
--I blocked the entire body out with 150 and while I wouldn't send it to paint without further attention it is pretty good. Driver's side is actually quite straight with just a dip up high where it will meet the door. Passenger side has some waves that did not come out yet. I'll block after Slick Sand and see it they are still there.
--The doors have a lot of waves that initial blocking did not take out. Again we'll see how they look after the high build primer. I'd bet that doesn't take all the waves out but there really is no point in trying to skim them until I get them hung and can see how they meet the main body. Like the earlier doors they need attention where the inner and outer are bonded at the top edge.
--The hood and trunk are both pretty straight and flat. Some waves at the edges but as with some of the other smaller imperfections that might disappear after blocking out the Slick Sand.

So, that's what I've encountered so far. I have all of the parting lines worked and filled, the wheelwells are cut and rolled and the door tops are rolled. Within the next few days I'll shoot it all with Slick Sand then get the body on the chassis to begin fitting the moveable panels. The Mk4 is definitely improved but the real test will be when I find out how well the doors, hood and trunk align with the main body after mounting. I'm hoping that it will be good enough to use that term "vast improvement"!

Nothing real exciting to see as far as photos right now; just filling and smoothing parting lines so far (same as on a Mk3 but with red dust instead of black!) but as things progress I'll add text and pics.

Cheers,
Jeff
 
See less See more
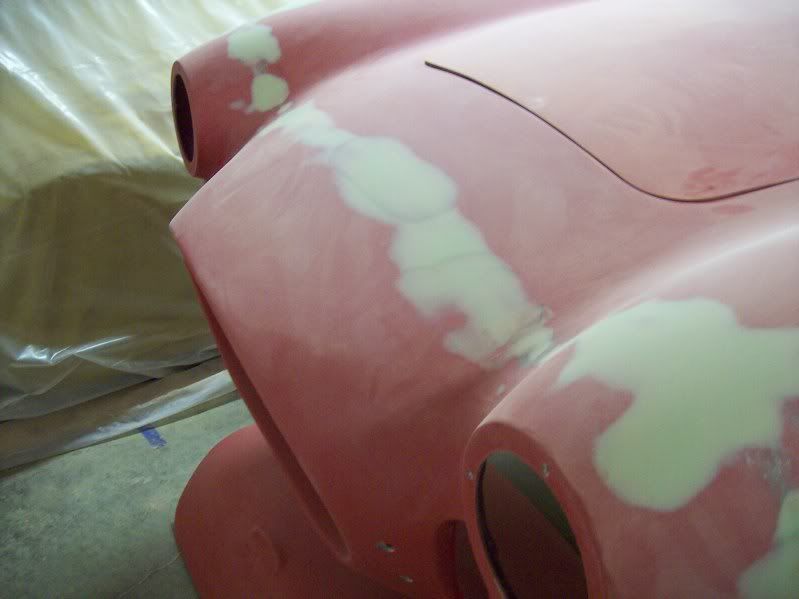
1
#2 ·
Jeff (and Steve) thanks for allowing us to follow your progress! I know my bodywork thread got a lot of posts and traffic last year and it's exciting to see this on a new and improved Mk. 4!

While we were working on the LCS "Dick Smith" build, I noticed when marking the panels for the painter, that the new hidden mount body sills gives us some more flexibility with getting the doors to align better with the body. It looked like a lot of the need to use filler would be eliminated. Hopefully you will find the same with Steve's car once you get the body on the chassis.

Word of advice with the Slick Sand...which I think was from you. Get it shaken and stirred (sorry James Bond) before your ready to use it. My two cans were like sludge in the bottom, making it hard to use. I also experienced with my 2.3mm tip primer gun, I needed to thin it with Acetone, but have now found out that regular Urethane reducer would be better. Helps with the flow.

If your garage (or wherever you're spraying) is not a controlled environment, be sure the temps are above and remain above 50 degrees when you're spraying Slick Sand and it's curing.

Who am I lecturing here...your the one who gave me all the tips last year!

Carry one, and uh hmmm...we need more than one photo!

Scott
 
#5 ·
Yo Scott!
I agree on the new body mounts. That was one of the first things I made note of when the car arrived. Are we taking bets on how much Rage it will take to make the doors and cowl meet? How about the bottom leading edge of the drivers door? Or left side of the trunklid to body intersection? ;)

I stopped by the paint store today to make sure they had SS in stock and told him I'll be back to pick it up next week about an hour before I start spraying! I'm planning to shoot it next Monday after I drop Nancy at the airport to fly back to Florida...that will give 4 days for the paint stink to clear out before she returns!

I can make (and hold) the garage at 90 degrees so no cure issues.

I'll add photos if something exciting happens; right now it's just plain ol' bodywork. Gotta run...need to go cough up a Rage/red gelcoat dust ball.

Jeff
 
#6 ·
Sooo.. got the body on so im about to start bodywork on my MK4 this weekend, what is the standard practice here? Sand seams/gelcoat, then Rage Gold, then Slick Sand, then more Rage Gold? Or are you using Rage Xtreme? Whats the difference between the two? I was under the impression that the Gold was the best, but its like $20 cheaper. I'm no stranger to bodywork, just to Evercoat products and fiberglass. I had planned on using locally obtainable products that have served me well in the past, however, everyone seems to be using the Evercoat stuff with good results over fiberglass.
 
#7 ·
Im new at this, so even basic pictures would help me out. And its the first thread on bodywork on a MK4 so the more pics the better. It will help alot of use new guys out if we see pics of basic progress and pics of the tools you are using. Thanks
 
#8 ·
AUME2010 - read as many body threads as you can. Stl-Scott has a good one. Also read threads in the Ask an Expert section - Ask StreetRodPainter. Don't hesitate to go back a yr or 2 in there...Body work on these cars has not really changed any. Sure, some of the different versions have different bad spots/problem areas - but the process, the materials are all the same. Cleaning and letting the body cure, grinding/filling the parting lines, straightening the panels, making any body mods, finalizing shape, refining body work (sand, sandable primer, repeat, repeat, etc) and so forth. As far as differences in Rage - ask your supply shop. I believe Rage is the thickest, Rage Gold is a bit thinner and Rage Extreme is the thinnest. What is better? All depends what and how you trying to fill a spot in.

Another thing to plan out in advance and research is materials. You want to make sure EVERYTHNG is compatible. Filler must be vinylesther compatible (Rage for basic filler if fine)...for added strength 3M HSRF. Jeff and Scott used Slick Sand for a sandable primer, many guys use 3M FeatherFill - Ok, now I am at the end of my knowledge base - both are sandable, high build primers...not sure if there are any compatibility differences from that point on (things like needing different brands/types of sealer and other paint stuff - that is what you need to check). I know it is good to understand and decide on the brands of stuff you will use - from fillers to final paint/clear before you begin.
 
#9 ·
There are a few more picture on my Build Website.
Click Painting.
See the URL in the signature below.
 
#10 · (Edited)
The BEST tutorial for self performed body prep and paint is Scott's detailed thread:

SCOTT'S BODY & PAINT THREAD

It is on a Mk3 but the principals are the same. Lots of pics and tons of info. I don't expect to go into such great detail here because I'm not breaking any new ground. Mostly this is to show how a Mk4 is improved, changed or different. I'll back up a little and add a few pics as well as some comments.
To answer a couple of questions:
I'm using Rage Gold, same as I did on my Mk3. It worked well so no need to change. Rage Extreme is supposed to flow even more smoothly and pinhole less, although I hear that a byproduct of that is that it is a lower viscosity which might it a little frustrating to use for such things as rolled edges and vertical surfaces.
Slick Sand and Feather Fill G2 are high build primers manufactured by Evercoat; basically sprayable fillers. After the initial bodywork they are applied and then block sanded, theoretically burying minor waves and flaws. Featherfill builds 2-4 mils per coat, Slick Sand 4-6. SS has a longer pot life (the amount of time allowed between mixing and spraying) of ~45 minutes vs. 30 for FF. Allegedly SS sands easier, although "sands easier" is relative, eh Scott! I used FF on my car, Scott used SS on his, I'm going to try SS on this one.
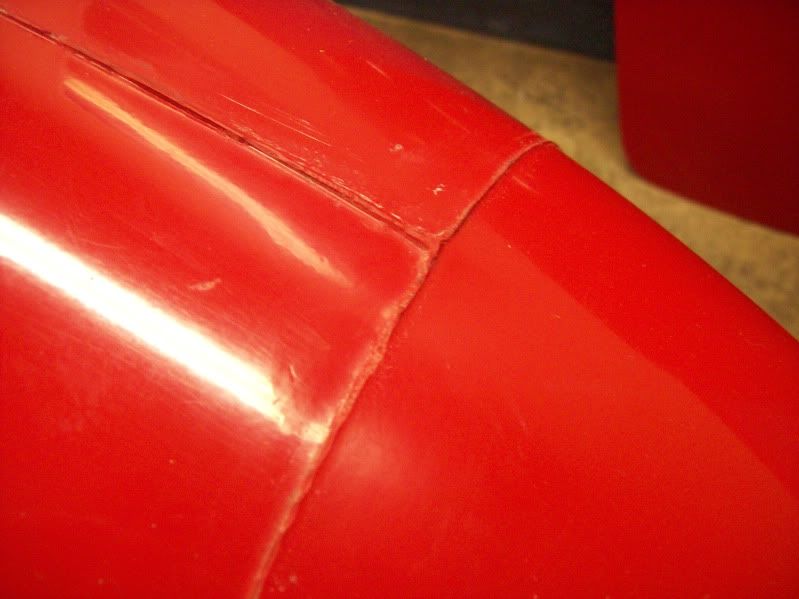
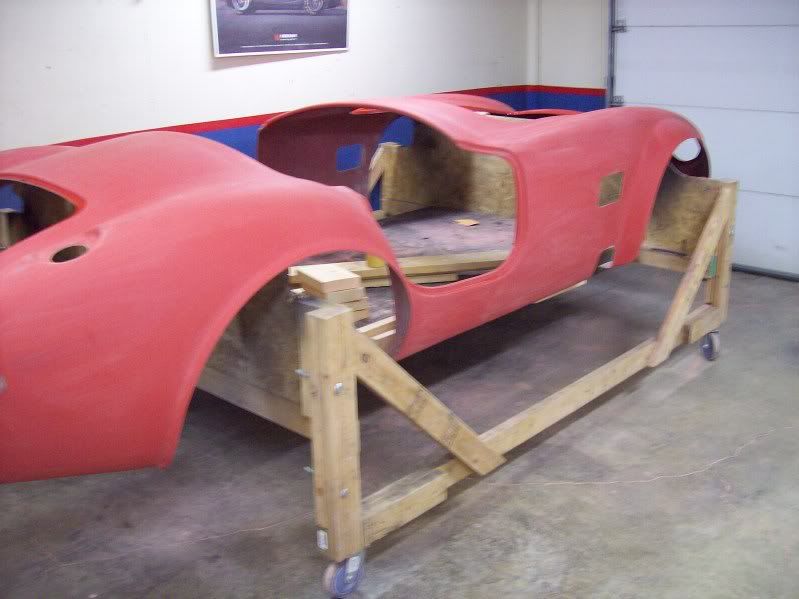
OK, lets add some pictures of the body as delivered. The parting lines are the first thing that most people look at. Personally I don't care how big the boogers are as long as they don't have voids and the panels align. Early bodies were hit and miss (sometimes they missed by A LOT!) on alignment.


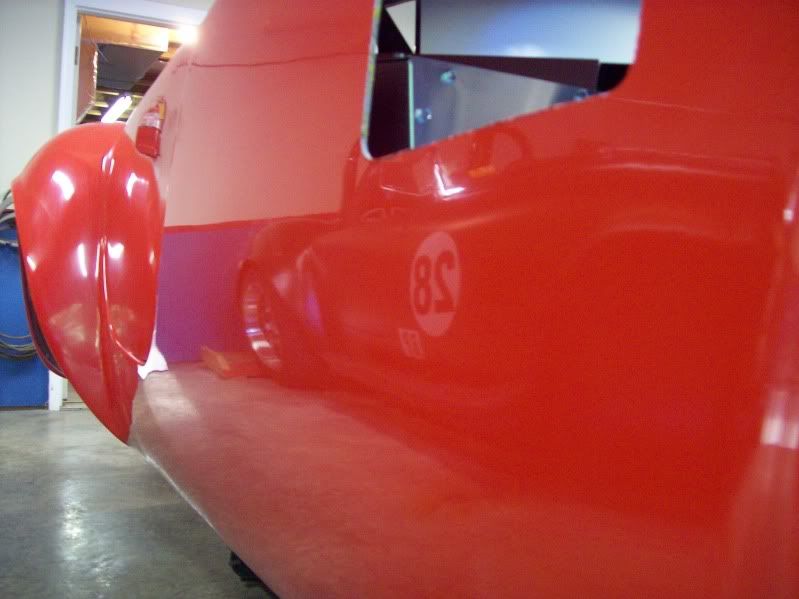
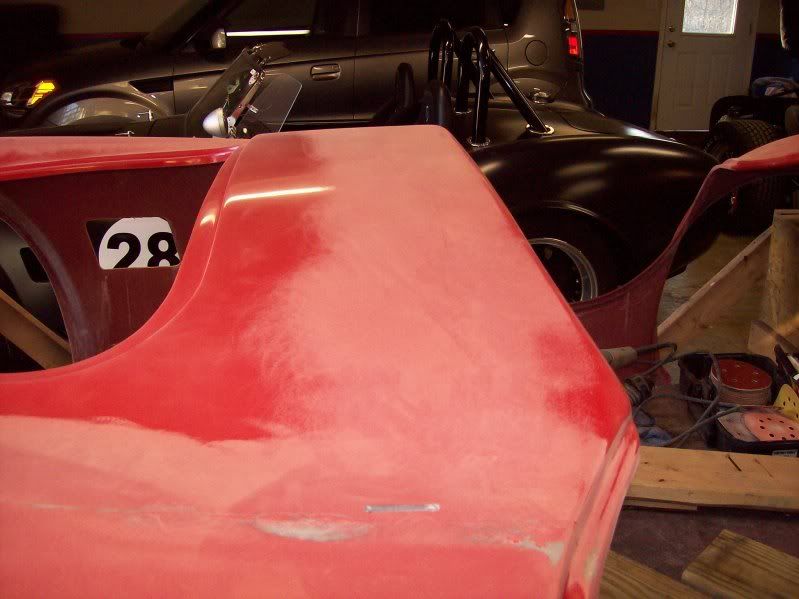
Minimal voids and the alignment was almost spot on. As the reflection in the photo below illustrates the major body is pretty straight and slick. In reality, after blocking it became apparent that this is the lumpier of the two sides


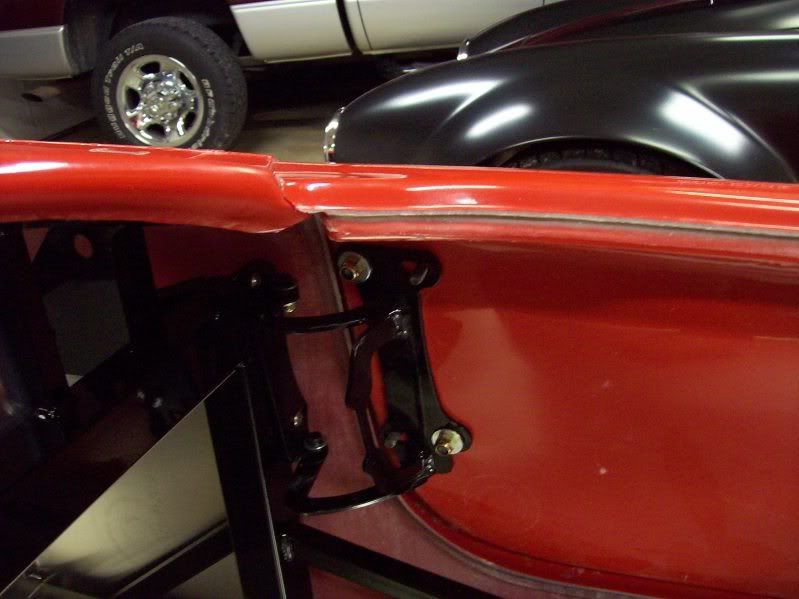
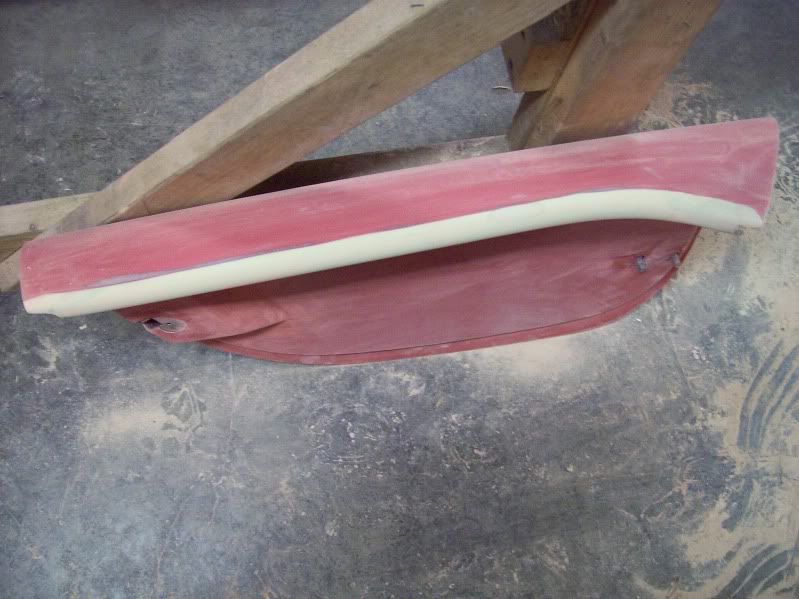
The front and rear cockpit edges are now rolled from the factory. The doors will still require attention because of the seam where the inner and outer are bonded.


More to come.
Jeff
 
#11 · (Edited)
The body was stored outside in the heat and sun since July. First order of business after bringing it to the garage was to clean it to remove all of the wax used in the molds. VERY IMPORTANT! Any leftover wax can contaminate fillers, primer or paint and lead to failure. This needs to be done before any sanding or grinding otherwise the wax is just getting embedded into the gelcoat or fiberglass. I washed it twice using PPG MX190 Cleaner & Degreaser, first with a soaked rag then with a green Scotchbrite. I wiped it down after the washes to pick up the dissolved wax and solvent using heavy paper shop towels like you can get in a box from Lowes or Home Depot. After the solvent wash it got cleaned again using Comet cleanser, Scotchbrite and hot water.

Following the cleaning I started knocking down the flash at parting lines using a DA with 80 grit. As mentioned above the most significant panel misalignment was at the RR quarter as can be seen here:


You have to kind of strike a balance in these cases; you may not want to make up the total difference by taking the high side all the way down to the low level or by building the low up to the high for fear of creating wonky contours. In the end it is usually a little of both. I stopped at the point shown here. You can also see some of the voids still remaining post sanding at the 3-way panel intersection. Going across the nose some more misalignment and voids appeared but overall the parting lines were not too bad; definitely improved over my Mk3.


The Mk4 has two new joints in the mold thanks to the rolled cockpit front and rear. They aligned perfectly; I’ll give them a light skim coat of mud but I’d almost bet that they would hide under Slick Sand or Featherfill.


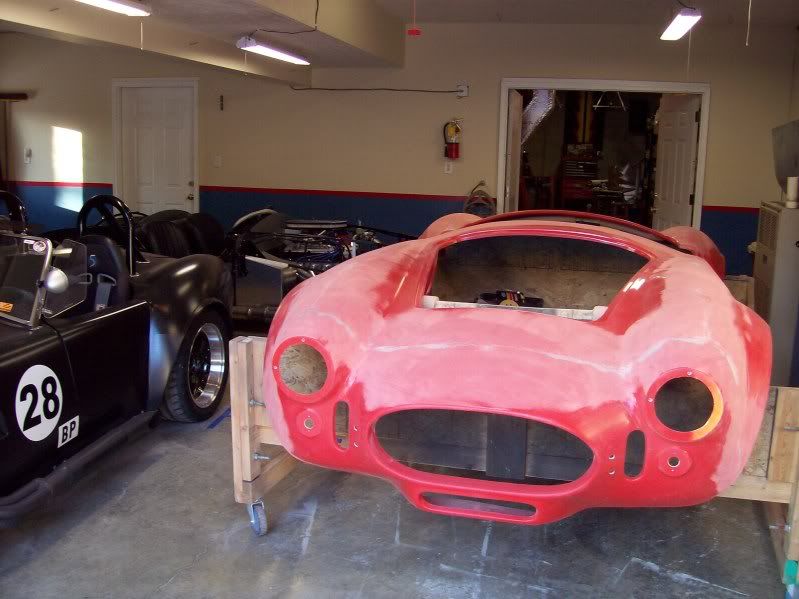
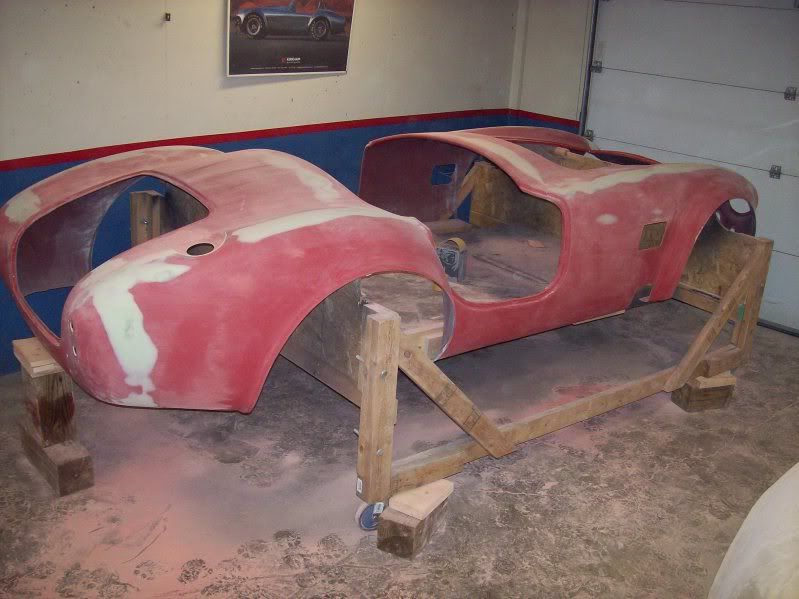
Finally, here it is with all of the parting lines knocked down.


Time to get busy draping plastic to section off this bay of the garage and then start blocking to find out how flat this thing is!

Jeff
 
#12 ·
Next I blocked the body with 150 using a combination of flexible boards I got from Eastwood a few years ago. You can adjust their rigidity by adding or removing the steel rods.


http://www.eastwood.com/5pc-adjustable-flexible-sander-kit.html

At this stage we are scuffing the gelcoat and trying to take out as much of the minor imperfections and waves as possible. Blocking will bring the high spots down and show the low areas by leaving them untouched. The idea is to use as long a block as the panel will allow and work following the contours. Use a smaller and/or more flexible block on the more complex curves. Oh, and don’t forget the foam pool noodle! They work great for working on a tight inside radius. Here it is all blocked and scuffed.


From here it goes outside and gets blown off (the dust just seems to never end!) then gets washed down with degreaser again. I followed that up with another wash using lacquer thinner. Time for Rage Gold!

More later after I can get some pics loaded.

Jeff
 
#13 ·
Jeff,

Excellent pictures and explanation.

Thanks for taking the time to do this.

George
 
#15 ·
Indeed I forgot to include a Thank You earlier. I need to see about sourcing some Evercoat products this weekend locally and I should be ready to get started. Mine will be a tad different since I mounted the body and I plan to drive it in gel coat for a day or two to shake it down really good. I "plan" on doing the bodywork on the car but we will see how that turns out.
 
#16 ·
Thanks for the Great Info, I'm a few mpnts away from the bodywork, but this thread is excellent info.
 
#18 ·
Thanks for the kind words guys, but really, read Scott's thread...then read it again! I'm just hitting the highlights here.

I'll load a couple more pics and add a bit more later this evening or in the AM.

Cheers,
Jeff
 
#19 ·
Jeff keep it coming please...this is good stuff...between Scott's thread and this one I'm starting to feel like I could probably attempt to do this myself...very heartening.
 
#20 · (Edited)
If you really want to do it you CAN do it Luis! Like I told Scott; there is almost nothing you can do to the body that can’t be undone.

I’m calling the filler good for now. After Slick Sand I’ll see what spots need more attention and touch up as necessary. Once the doors are mounted they will require another application or two of Rage Gold to blend into the rolled cockpit edges. I’m going to keep my fingers crossed and hope that some of the main body to movable panel interfaces that were frequently problematic on Mk3s, such as the leading edge of the driver’s door, have been resolved. We’ll know when it all goes back onto the chassis.

To give you an idea of what you might expect as far as filling and shaping goes here are some pictures to match up with “before” shots. The door seams have been ground, filled and rolled (a before picture is in post #10):


Again referring back to post #10 there are photos of the LH front fender & nose intersection as well as looking down the RH fender top; here are a couple of shots from the same general area:


Compare the finished nose here with the photo in post #11 that shows the small voids and misalignment:


BTW, the hood is just sitting on the opening in the photos above; it has not been trimmed to size or fitted yet. That will happen after the body is back on the chassis and the hood can be mounted to it's hinges.

More later.

Jeff
 
#21 ·
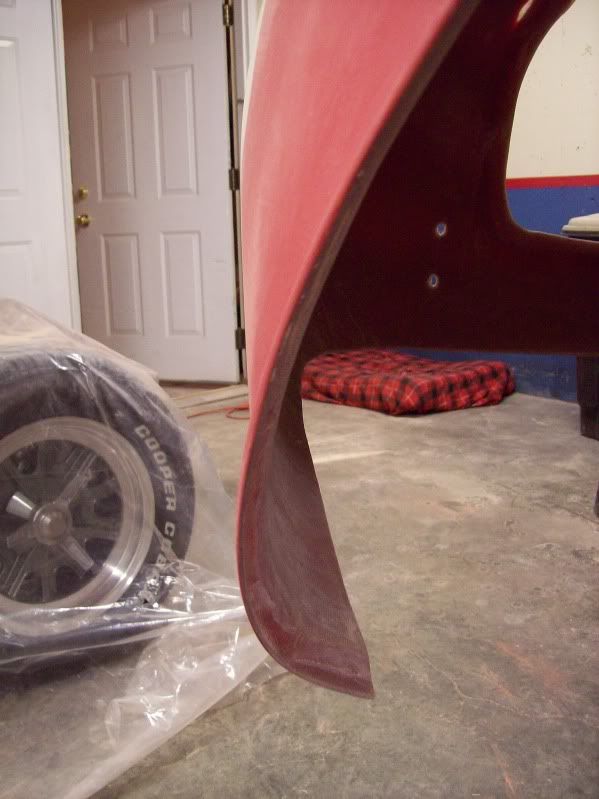
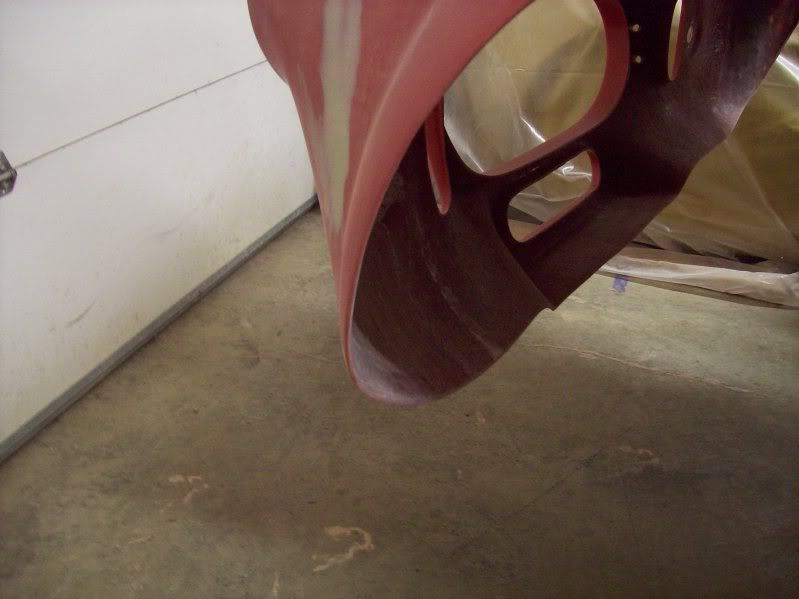
The Mk4 has much more fully defined wheelwell openings. With my Mk3, and others that I have seen, the fiberglass was just kind of left to run wild after the opening. It seems they often needed additional filling and repair to get a nice shape. Judging by Steve’s #7276 that appears to be a thing of the past; it just needed a small amount of filling at the lower front of the RR and the rear edge of the RF. Here is the right rear as delivered:


Here it is after trimming and rolling the edges:


And the left front:


I first cut them back using an abrasive disc on an angle grinder, then worked them down further with the DA and 80 grit. After that it is up to your eyes and hands...sorry, no secret special tools!

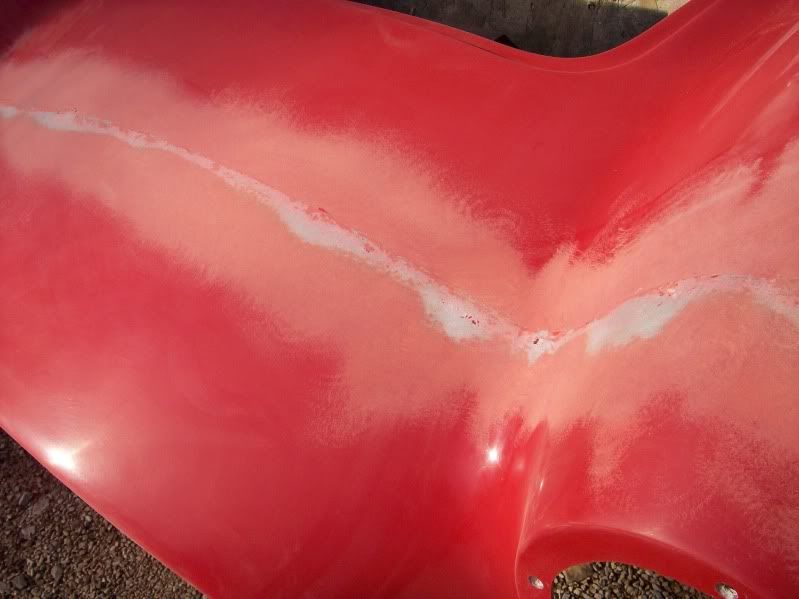
The body molds have a break that surrounds the fuel filler inset. On every body I have ever seen of any vintage that area is one of the most ragged, usually with some voids. You just have to get the flashing down and start building it back up while shaping with Rage. This is another area that seems to be done best with hand work rather than any kind of blocks or tools:


That’s it for now.

Jeff
 
#22 ·
re. driver side door alignment

Jeff, looking real nice. Im happy someone is doing a body thread on the mark 4. Very inspiring to us body newbys. I have the same body and the driver door is just as bad as the mk. 3. I have about 3/8" low on bottom front door so that tells me ffr didnt address the problem. Yes I pulled the body out to help the fit as much as possible. I was wondering if anybody cut the lower front seam on the door skin to pullout the door to flush and fill the gap in the seam ? Keep up the good work and thank you.
 
#25 ·
Jeff, it's funny I really like the red shiny gel coat on the new Mk. 4's, but seeing it all over the floor in the sanding dust looks like something radioactive went off.

I'm sure jealous at how fast this is going for you (basically about 1 month in on body work, eh?) I guess the 2nd time makes it go faster.

Okay, I'm about ready to do my Camry...almost (inside story between Jeff, Thierry and me).
 
#26 · (Edited)
Steve owns the dust so he might want to keep it as a souvenir! Maybe we can send it back to Wareham to be recycled. It was warmer when I did mine so I was able to do about 90% of the work outside keeping most of the dust out of the garage. I don't know about the red being radioactive but it sure does have a distinct odor that the black gelcoat did not. :puke:

Remember Scott, this body has not been on the chasis for door, hood and trunk fitting yet. I'd like to think that progress can continue to be swift but once the movable panels meet the body it could be payback time.

I could have done without that news Kevin...I guess I'd have found out for myself soon enough, huh? :sad:

Jeff
 
This is an older thread, you may not receive a response, and could be reviving an old thread. Please consider creating a new thread.
Top