

The horrible weather we are having in Ohio this winter resulted in my office being closed today, and I finally had time to get to work on the roadster.
She arrived home on 2/1/14, and I completed the inventory on 2/2/14. Earlier this week, I worked on preparing some parts for paint, and they are on the workbench, ready for that. However, it has been too cold to attempt painting bare steel so far. My shop warms up to about 60F with the heaters, but I am not confident that is warm enough for the paint to stick. Maybe in a few weeks it will warm up a bit...
Anyway, today I accomplished several things, and it was very rewarding and exciting to actually get my hands into the build.
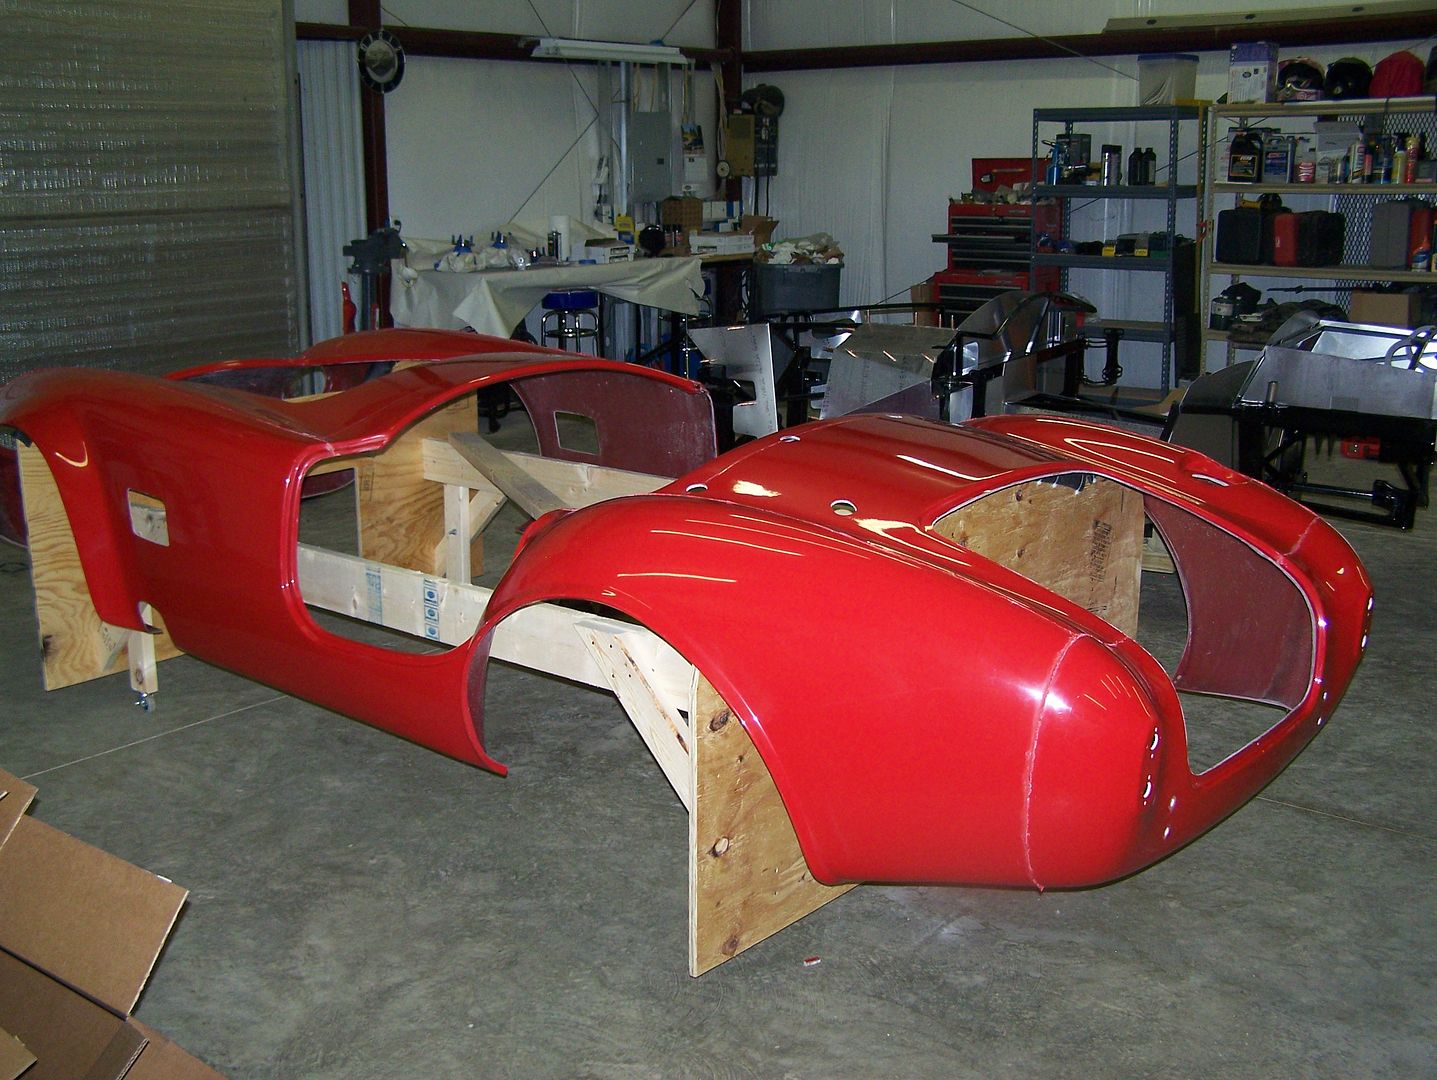
First, I removed the doors, hood, and trunklid, then my wife and two daughters helped remove the body and place on the body buck.
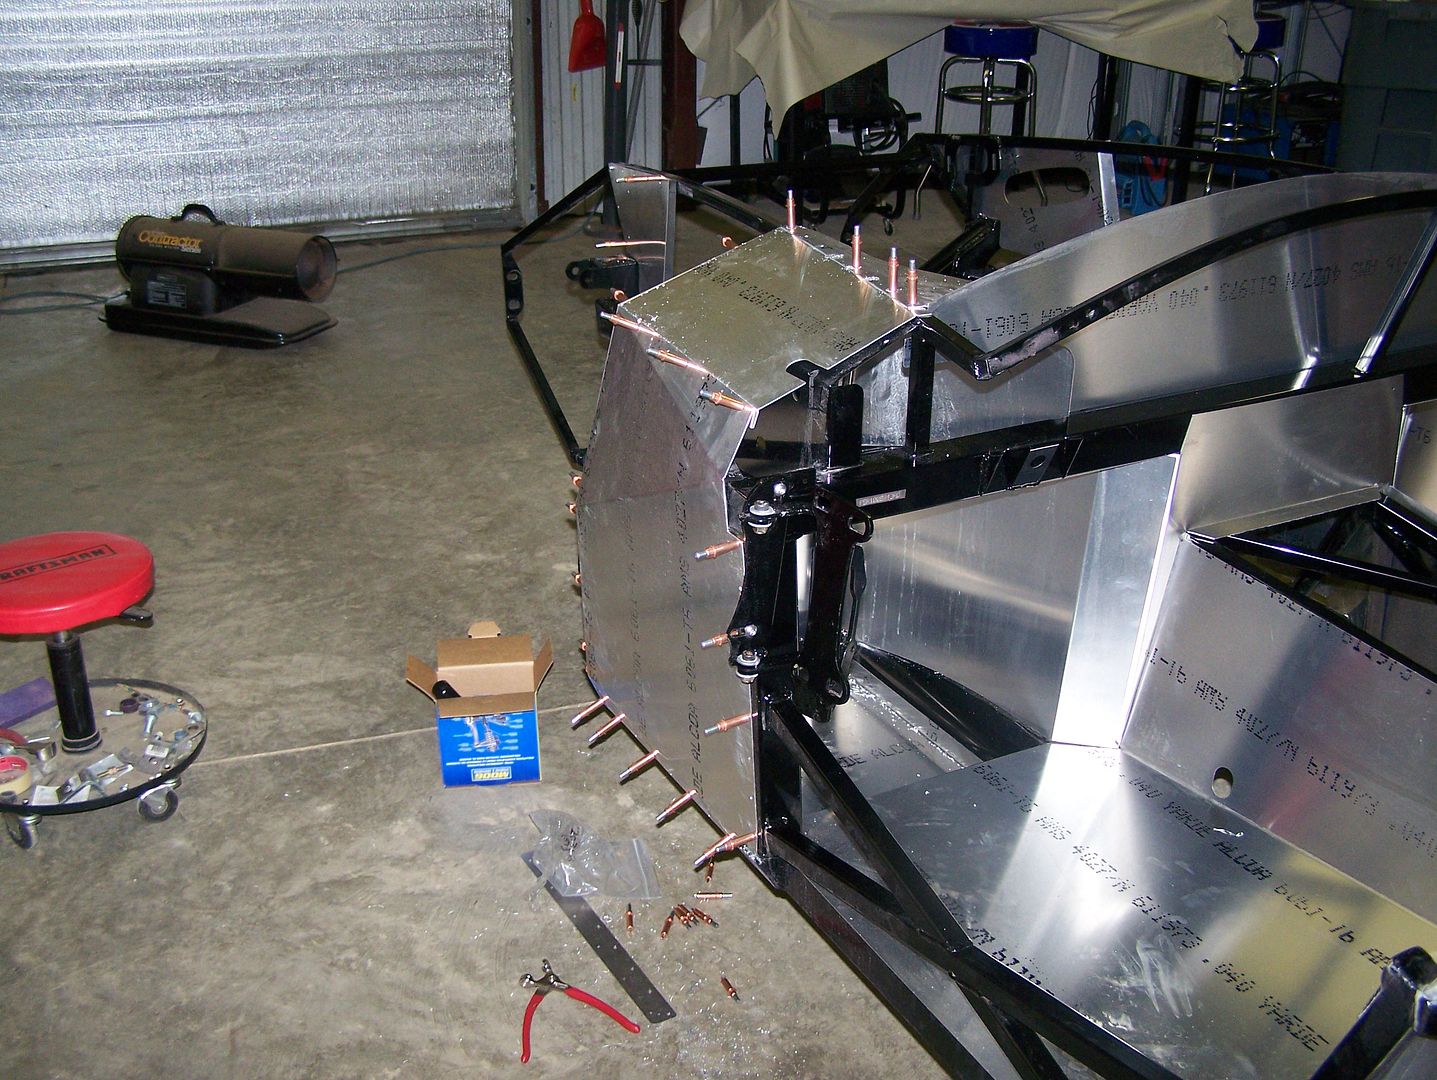
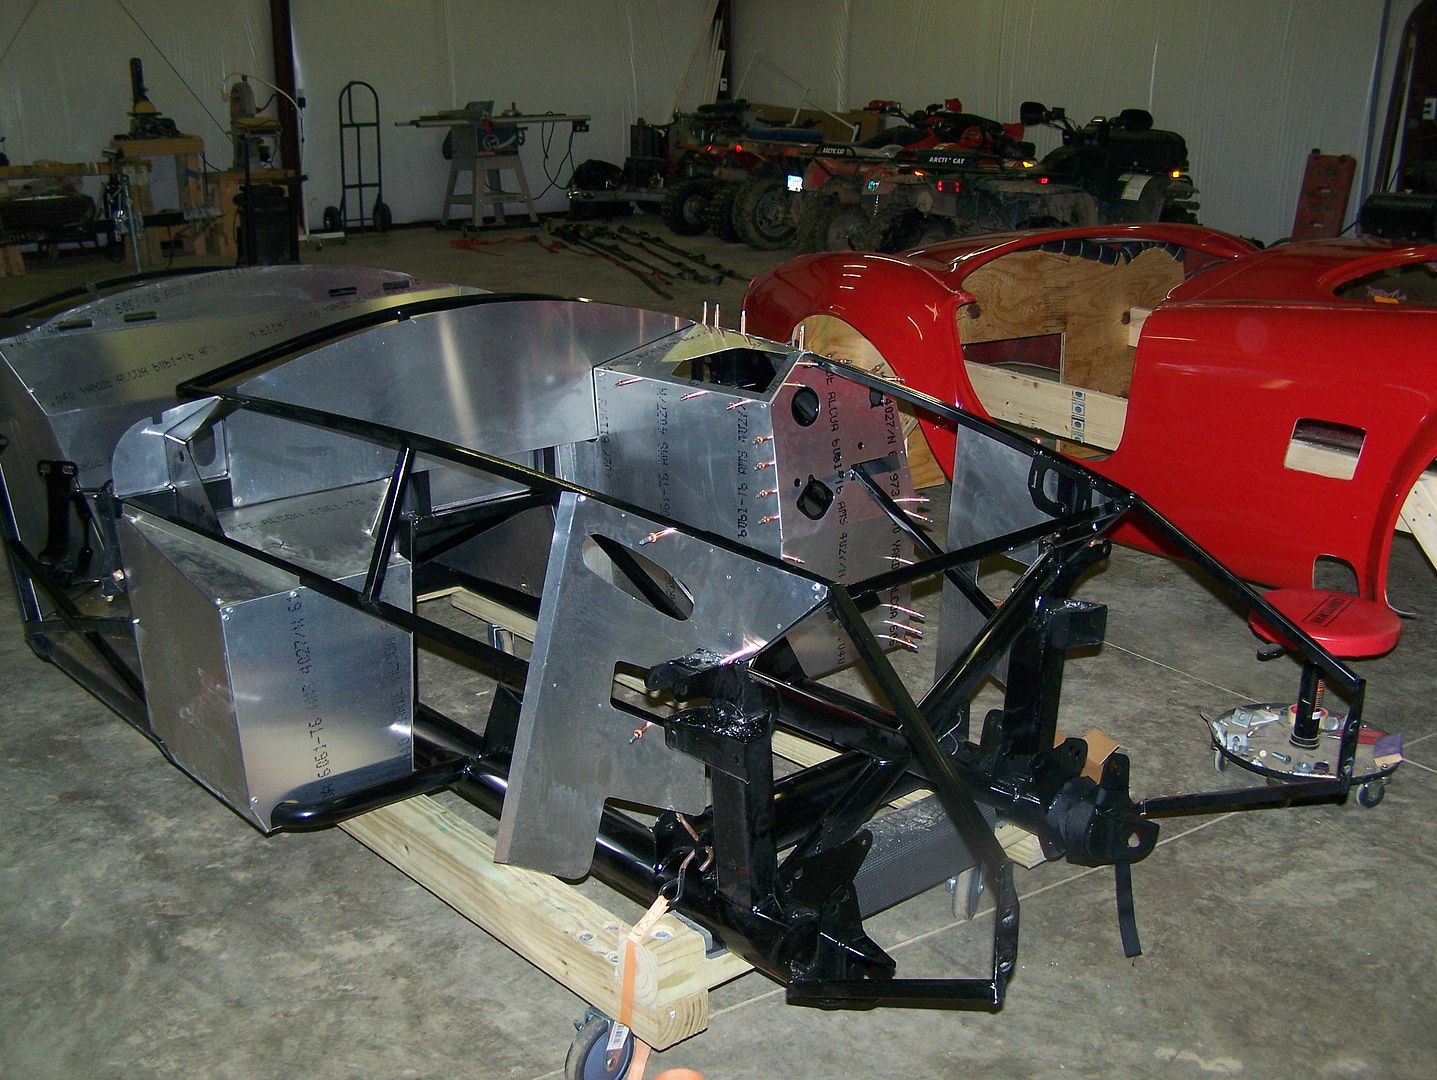
Then we started fitting and drilling the aluminum panels. I completed the two F panels (except for the block off plate) and most of the driver's footbox.
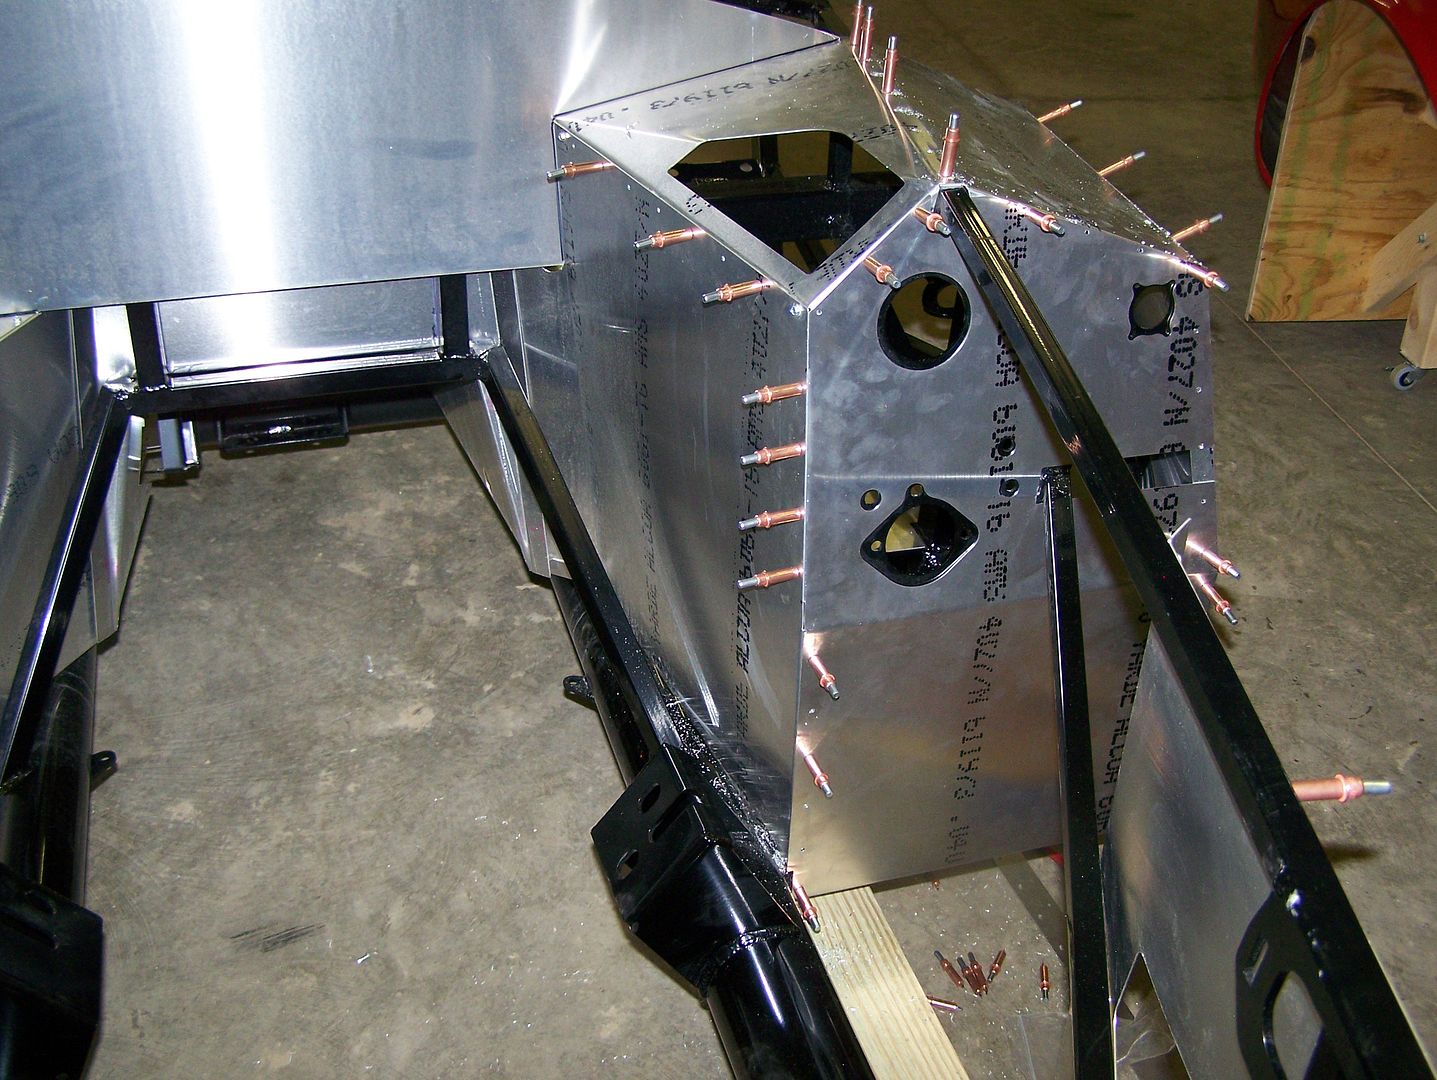
I was wondering if I need to add an access panel to the inside of the driver footbox so that I can tighten the header bolts when the engine is in. I have read several threads about people having a lot of trouble with that.
The access panel in the top of the driver footbox was already put there by FFR. I guess since many people added one, they just did it for me. I had expected to need to make that hole myself.
I guess it's time to order some rivnuts and a tool to mount that. It just seems the right thing to do with it.
More as I get more done. (Happy Day!)
-Steve
She arrived home on 2/1/14, and I completed the inventory on 2/2/14. Earlier this week, I worked on preparing some parts for paint, and they are on the workbench, ready for that. However, it has been too cold to attempt painting bare steel so far. My shop warms up to about 60F with the heaters, but I am not confident that is warm enough for the paint to stick. Maybe in a few weeks it will warm up a bit...
Anyway, today I accomplished several things, and it was very rewarding and exciting to actually get my hands into the build.
First, I removed the doors, hood, and trunklid, then my wife and two daughters helped remove the body and place on the body buck.

Then we started fitting and drilling the aluminum panels. I completed the two F panels (except for the block off plate) and most of the driver's footbox.


I was wondering if I need to add an access panel to the inside of the driver footbox so that I can tighten the header bolts when the engine is in. I have read several threads about people having a lot of trouble with that.
The access panel in the top of the driver footbox was already put there by FFR. I guess since many people added one, they just did it for me. I had expected to need to make that hole myself.
I guess it's time to order some rivnuts and a tool to mount that. It just seems the right thing to do with it.
More as I get more done. (Happy Day!)
-Steve
")


