Factory Five Racing Forum banner

MK3.1 #7076 Build Thread...

40K views 115 replies 26 participants last post by  ClemsonS197  
#1 ·
Well, I figure it's time I start one of these.

After saving for nearly two years and getting ready to buy, I found someone who had given up on building their kit near Chicago, Il. It had almost everything I was looking for, and the price was right. After getting quotes from $1,500 to $2,000 to have it shipped, it was time for a road trip.


My father-in-law graciously offered his F-250 and a 15' trailer. We left Atlanta on a friday afternoon and drove until the wee hours of Saturday morning stopping in Lafayette, IN. The next morning, we finished the drive to Chicago:

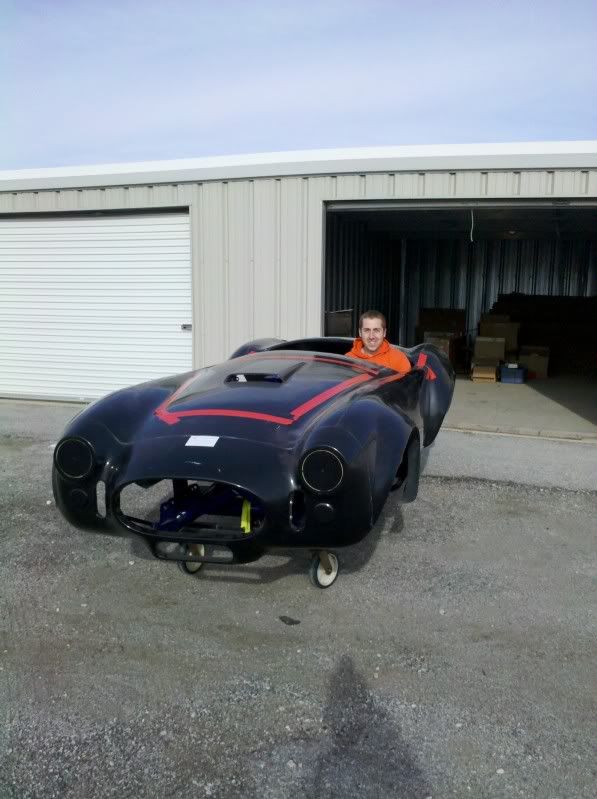
Obligatory "driving" photo:
Image


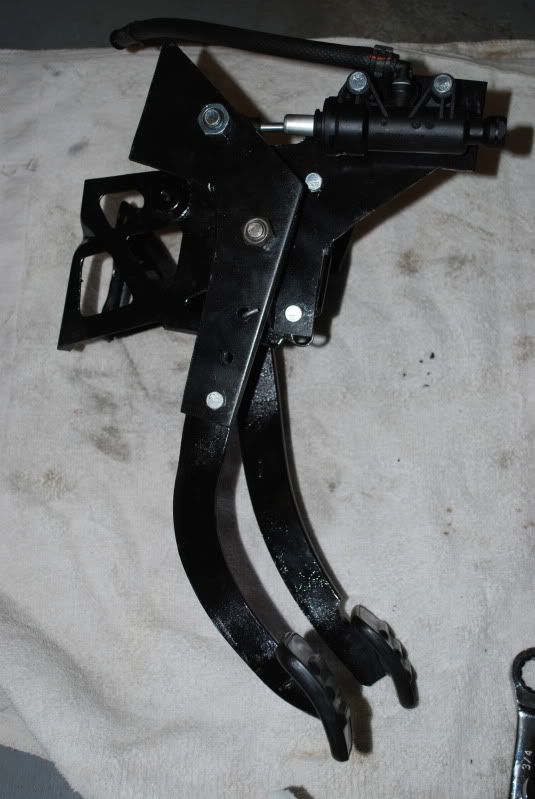
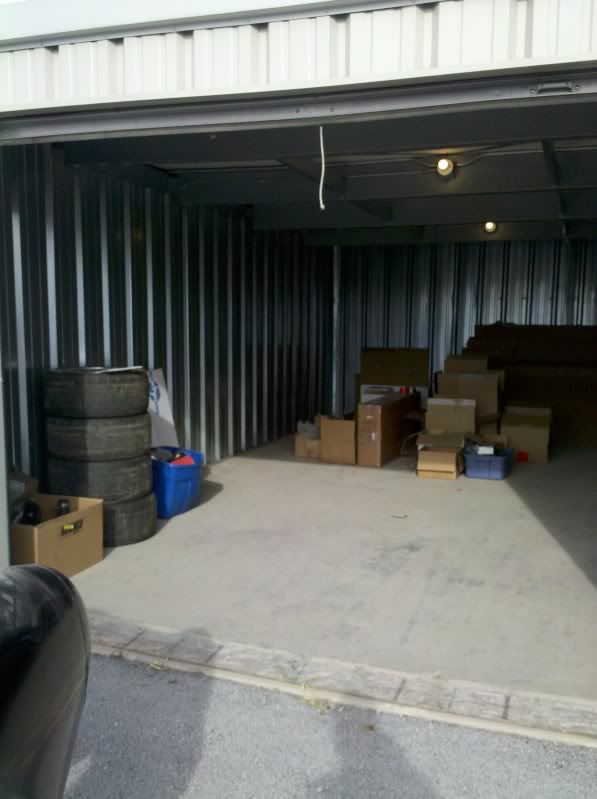
All the boxes and parts that are being sold with it:
Image


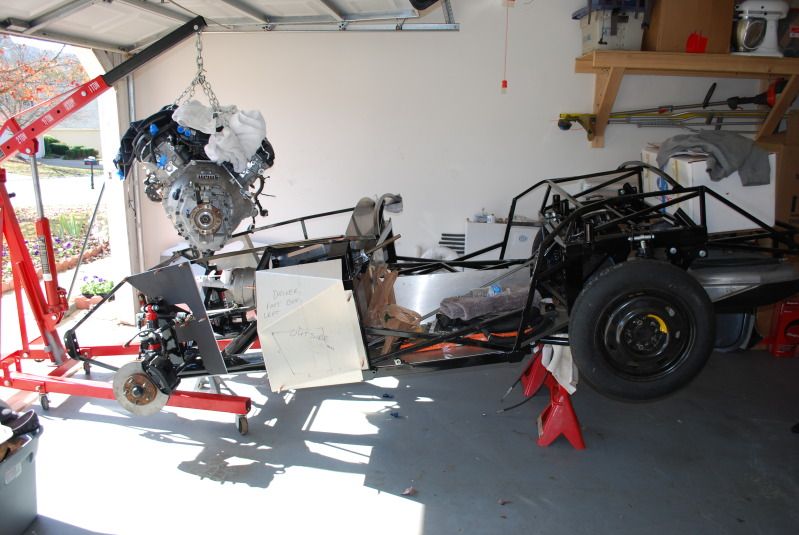
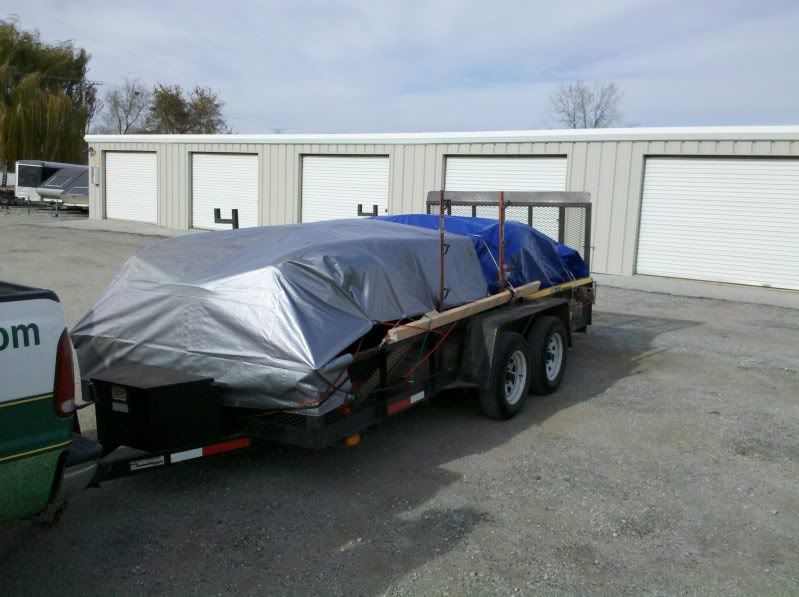
All loaded up on the 15' trailer pulled by an 05 F-250:
Image


33 hours after we left, we made it back to Atlanta a little after midnight Sunday morning.

The truck got 11.8 mpg over 1,392 miles.
 
#2 · (Edited)
Got the chassis home and ready to start:

Image


First order of business is getting the fiberglass body on the body buck so I can roll it outside and work on the frame:
Image


Next is getting the footbox enlarged and the 3-link upgrade welded on.

Image
 
#3 · (Edited)
The blue paint the previous owner added was chipping and just poor in application. I opted to have the frame stripped and powdercoated black.


Image


Here's the results of the Footbox mod. Basically replaced the 1.5" DOM with 1.5x1.5 square tube on teh lower portion. We recreated the upper curved 1.5" DOM to meet then intersection point. Blue is obviously old...

Image


Here's how much space was gained. Not a lot, but that corner definitely opened up.

Image
 
#4 ·
Build Plans:

Coyote Motor
Tremec 3650 (05+) or Getrag MT82 Transmission
3-Link rear
Heated seats
Heater
Footbox vents
Radio
High-back seats
17" Halibrands
Body work and paint myself.

Hoping to keep it at or under $20K. So far, it looks obtainable. :evil:
 
#5 ·
Built the custom bracket for the Coyote drive-by-wire pedal to work with the Mustang brake/clutch. Bent the Mustang pedals 1.5" to the left. They both need a little tweaking.
Image

Image


Cut the brackets for the hydraulic clutch cylinder out of metal and got them mounted.
Image


8.8 rear end rebuilt with new 3.55 gears and Ford trac lock.
Image
 
#9 ·
So I probably have about 12 hours worth of thinking, measuring, cutting, and trial & error in this pedal set. Got everything mounted up today. Hopefully it will work.

Parts:
Coyote drive-by-wire pedal
SN95 Pedal Box
2005-2009 Pedal Box
3/16" steel plate

I know there is already a Coyote pedal solution but it involves cutting the pedal down which changes the range of motion, plus increases effort. I wanted a solution that keeps the pedal as is.

Here's the Coyote Pedal from Ford:

Image


Obviously the flanges need to be cut off so the inner sheet metal wont interfere. I then decided to build a bracket that would mount to the pedal bracket provided on the Factory Five chassis (right).

Image


The coyote pedal mounts to the upper portion, and the lower portion mounts to the frame. The upper left hand corner is notched for steering shaft clearance.

Image


Here's the bracket mocked up in the chassis.

Image
 
#10 ·
Next, I bolted the pedal in. The pedal bolts to the chassis in numerous places.

Image


To strengthen it, I used aluminum spacers to add mounting points to the 'firewall' where the pedal box attaches. You can also see the notch for the steering shaft. I had to inboard the bearing for the Whitby booster kit. Even with the spacers, it didn't clear.

Image


So that's how I mounted my Coyote pedal. On to the Brake/Clutch...

I started with a SN95 box and built two custom brackets (center top and top left) for the hydraulic clutch actuator from the 05+ box (top). The silver spring on the left side of the box is off the 05+ pedal box. It's the return for the clutch. To get the spring to fit, I cut 1/4" off the bolt on the right hand side, and put it on the left.

Image


Next, the two new brackets get bolted to the SN95 box. The pointed bracket bolts to the outside of the clutch pedal, and the other to the SN95 box. The clutch pedal now compresses the hydraulic actuator when you push the pedal in.

Image
 
#11 ·
Image

Image


The hydraulic actuator is the same distance and travel as the 05+ box. I just flipped it around due to space constraints. The 05+ transmissions use the master cylinder and brake fluid as their working fluid. I plan on adding a 3rd Wilwood reservoir for the clutch.

Image


Everything together with bent pedals. I'll add a dead pedal bump out and should have a decent space for my size 13's.

Image
 
#12 ·
Got the Whitby booster bolted up. Like many, I had to inboard the steering shaft bearing.

Image

Image


Also, I flipped the rear coilovers for clearance and cut down the quad shock mounts to use as a mount for the brake lines. I stole it from someone else's pictures here but it's a good idea.

Image
 
#14 ·
Fuel line routing. Using a Modular motor so it needs a return line. Opted to run them against the passenger side 4" tube.

Image


Re-used as much as I could from the donor parts.

Image


Image


Any critiques, hints, or tips appreciated. Thanks.
 
#18 · (Edited)
I'm using the stock fuel lines and have no problems. It should work good for you. When you mount your fuel pump (if it's external) make sure it is mounted with the rubber mounts to reduce vibration/noise. I wish mine was quieter...

Your build looks great.

Image
 
#19 ·
Well, Christmas came early. Hoisting my present from the back of the truck...

Image


All cozy in the garage...

Image


As far as I know, I'm the first one using a donor Coyote. It's out of a wrecked 2012. Hopefully I'll have everything I need by next weekend to put it in the chassis. :001_tt1:
 
#20 ·
Nice find on the motor, it's amazing that people are already trashing the new 5.0 Mustangs.

How many miles on the motor? Did you get the 6-speed with it or you going back to any earlier version of the TR-3650 5-speed? Curious how the new motor will work gearing wise with an older transmission set-up.
 
#21 ·
I lost out on a few 2011 motors, and just stumbled upon this 2012 and the price was right.

~200 miles on it. Didn't get the 6 speed as I don't much care for the gear spacing. Adding in the light weight of the car and it would get even shorter.

I'm using an 07 T3650 with 3.55 rear end. It'll be the same set up I had in my 2006 Mustang GT and I liked that. More power with less weight should be nice too.
 
#22 ·
I liked your drivers side footbox mod. I did a similiar mod to mine but did not replace the bottom tube instead I used a steel floor to attach the extended side to. My foot got caught in that space when I wrecked my car and separated my foot from my leg so I was a little gun-shy about that gap. You build looks great!

Image
 
#23 ·
That new motor looks and sounds so good.
Only 200 miles!? ouch, that had to hurt the original owner :001_tongue: good for you! :001_smile: It's not even broke-in yet!
 
#25 ·
Dropped the chassis down in front, and lifted the rear as high as it would go
Image


Success!
Image


Question on motor mounts. Is this the correct hole for a mod motor (Drivers side shown)? there is a ton of room behind the motor to move it back, if needed.

Image
 
#26 ·
The new Ford Racing instructions are to set the regulator at 55psi. Some of my fittings were only rated to 50psi, so I redid the fuel lines.

Image


Image


The AN fittings to the stock pump are:

1/4" size:
Blue - Russell Performance 641300 - Russell Push-On EFI Fittings - Overview - SummitRacing.com
Black - Russell Performance 641303 - Russell Push-On EFI Fittings - Overview - SummitRacing.com

5/16" size:
Blue - Russell Performance 640860 - Russell Fuel Rail Fitting Adapters - Overview - SummitRacing.com
Black - Russell Performance 640863 - Russell Fuel Rail Fitting Adapters - Overview - SummitRacing.com

3/8" size:
Blue - Russell Performance 640850 - Russell Fuel Rail Fitting Adapters - Overview - SummitRacing.com
Black - Russell Performance 640853 - Russell Fuel Rail Fitting Adapters - Overview - SummitRacing.com

Thanks to HIRISC for those parts. Also, the 3/8" fitting is also needed for the Coyote fuel rail. I also installed a new Walbro 255lph in-tank pump.


My 17" Kirkey Pro Drag seats arrived. They should provide a couple extra inches of leg room:

Image
 
#48 · (Edited)
Hey quick dumb question. How many barbs are on the engine fuel rail? Just one I am assuming, tho I could see it being two.

Thanks!

The new Ford Racing instructions are to set the regulator at 55psi. Some of my fittings were only rated to 50psi, so I redid the fuel lines.

3/8" size:
Blue - Russell Performance 640850 - Russell Fuel Rail Fitting Adapters - Overview - SummitRacing.com
Black - Russell Performance 640853 - Russell Fuel Rail Fitting Adapters - Overview - SummitRacing.com

Thanks to HIRISC for those parts. Also, the 3/8" fitting is also needed for the Coyote fuel rail. I also installed a new Walbro 255lph in-tank pump.
 
#27 ·
I started working on the Ford Racing Harness. Got the computer mounted (still need to clean them up) and the module mounted behind the dash. I also mounted the Summit heater:

Image


Image


Decided to rebuild the rear calipers and added some slotted/drilled rotors:

Image